 |
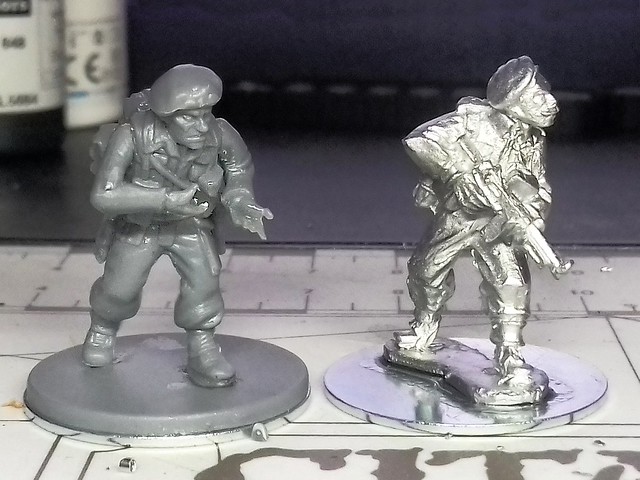
| Above: One of my current (1/56) figures next to one of the (1/72) Germans that I completed last year. I like the way I did the base, but I forgot to document just how I did it! |
After some examination of figures I had previously done I think I have a rough idea of the 'recipe'...
[Bear in mind that I don't create the base in isolation, I work on it as I paint the figure itself. It's not done in one go, but over a period of time finishing after the painting of the figure is completed.]
[Bear in mind that I don't create the base in isolation, I work on it as I paint the figure itself. It's not done in one go, but over a period of time finishing after the painting of the figure is completed.]
1. Base: The foundation of the 28mm base is a 25mm diameter disc, though - as I mentioned in a previous post - I like to base my Bolt Action figures on metal discs (in this case, 25mm steel repair washers).
2. Ground Effect: Next I build up the 'ground' with a rough application of quick drying PollyFilla. This I either mix with some dark brown paint or with Vallejo's 'Black Lava' compound so that the PolyFilla plaster is no longer white.
3. Base Colour: Once dry, I slap on some Vallejo Black Brown as my earth base layer.
4. Wash: Then I apply a black wash to pick out the nooks and crannies.
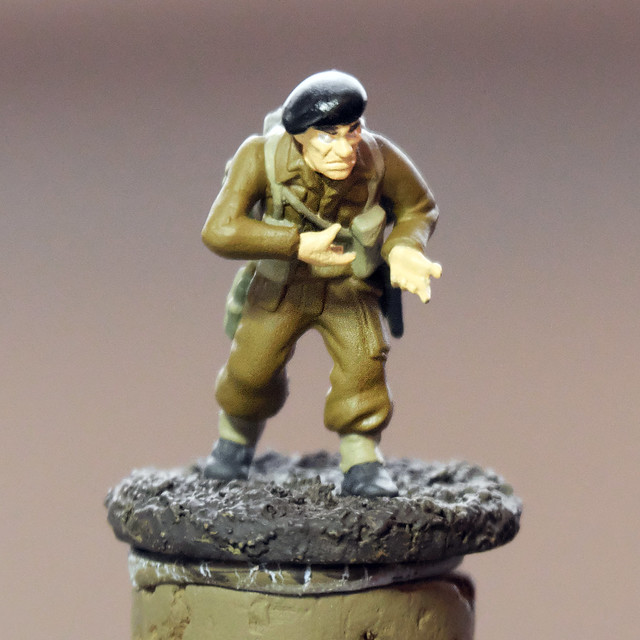
5. Rocks and stones: I'm not too fond of the fake 'flowers' that seem to be in fashion as base ornamentation at the moment. I prefer to keep things simple, just some 'moss' (or grass) and some random 'rocks'. I super glue some tiny pebbles I find in the back yard onto the bases. [Note: I may do this stage while laying down the Pollyfilla/Lava material so that the stones stick in the 'ground' instead of being glued on top of it.]
6. First High-Lights: I then start my highlight dry-brushing, with - first - a medium brown (Burnt Umber mixed with Khaki) and then I dry-brush a very light highlight on top of Khaki.

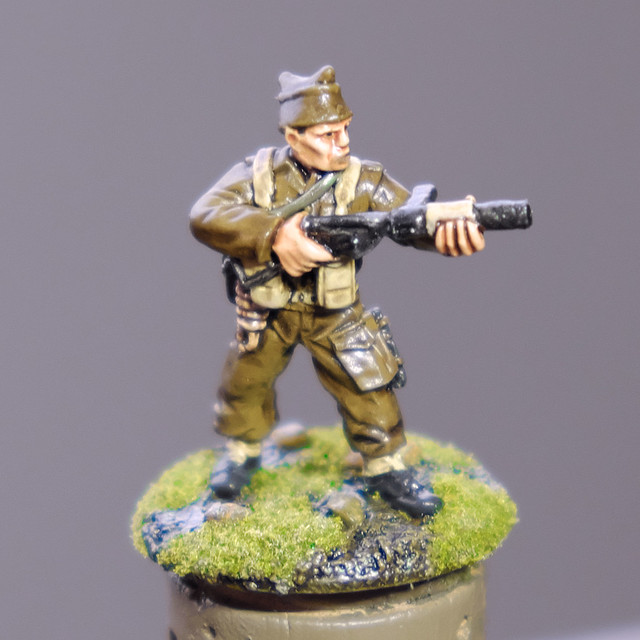
7. Grass: I don't bother with fancy static grass, just plain old flock from my local railway model shop (the cheapest mid-green colour). I like a bit of 'earth' showing through...

8. Finishing Highlighting: As it is the grassy base is still a little flat and bland, so I then go in and do some extra highlighting and colouring just to pick it up a little. I did some gentle dry-brushing with Vallejo's Stone Grey and then added some spots of Citadel's Agrax Earthshade wash here and there for some extra depth or where I thought my 'ground' was becoming too light (the idea is to create contrast).
I also very lightly dabbed some spots of Vallejo Stone Grey onto the flock 'grass' to add some areas of bleached grass. Just for some variety in colour.
I also very lightly dabbed some spots of Vallejo Stone Grey onto the flock 'grass' to add some areas of bleached grass. Just for some variety in colour.
9. Glossing: Although this stage is actually to provide the paintwork with some protection and prepare the model for the addition of decals, a coat of varnish also helps to stick down that pesky flocking (which has a tendency to moult if you aren't fastidious with your glueing)!
Conclusion...
I did notice that while this worked perfectly well for my smaller 1/72 war game figures, I think I need to add a little more texture to the larger 28mm scale disc base. In retrospect, this is probably why many modellers add 'flowers' and tall grass clumps to their bases.
I am still a bit adverse to flowers but will experiment with other texture additions in future figures.
No comments:
Post a Comment