- 1. Using Pledge Klear as both a base for decals and as a sealant, sprayed on with an airbrush, and...
- 2. Weathering techniques for aircraft
Well, today I try out the first of these operation - using Klear and adding decals.

Now I have already played with Pledge Klear as a brushed on base layer on which to apply decals and I have also used Klear as a dip for my clear plastic parts. But I have not airbrushed on Klear as a decal base before, in fact this is my first use of an airbrush in any of my modelling!
I hope to start phasing out my use of 'rattle cans' but I was a bit unwilling to pour something so sticky as Klear into my good airbrush so I bought a cheaper spray gun to use specifically for varnishing products. This is Revell's Starter Airbrush Set at £12.99 from ModelZone and it runs off compressed air cans.
In the above photo you can see the two household products that I want to try out with this cheap airbrush - Pledge Klear and Windolene. Klear is the acrylic lacquer of course, but Windolene was recommended as the best product to run through my airbrush after using Klear to clean it out (something about ammonia content apparently).
I used Klear neat through my brush as it is pretty runny anyway and I just sprayed on a very light coat. My tests on some plastic yoghurt pots that I sprayed silver showed that if you sprayed too much it tended to bead on the surface and run.
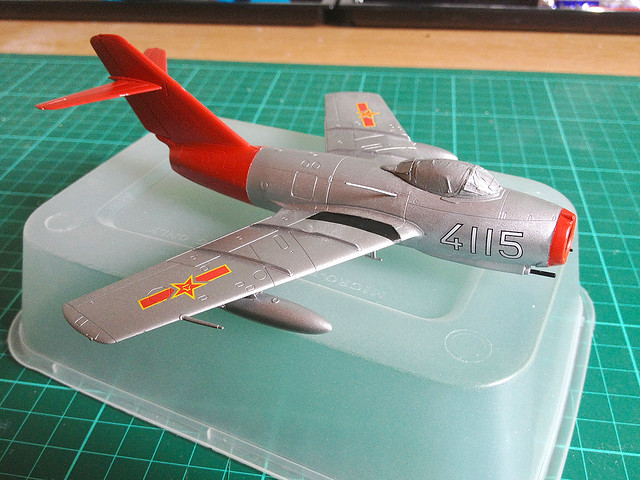
Hobby Boss decals...
So, having sprayed on my base layer of Klear I started to ad my decals, and here's where I hit my first problem. The Hobby Boss decals are - like the kit - very cheap. They are the glossy variety that I have come across before in an Italieri kit, only thinner.
They come off very quicky when dunked in water, but when I laid them on to my MICRO SOL pre-treated surface they immediately began to stick and melt!
These cheap decals reacted very badly to the Micro Sol and I would warn you against using this product with Hobby Boss decals - just use normal water with them and they will retain their water slide property for placement. With Micro Sol they stuck to the surface almost immediately and didn't want to shift again!
Next: Well, on to exciting part - the weathering. I accept right from the start that this is where things might go terribly wrong and I am prepared to right off this kit as an experiment (which is the reason I bought this cheap kit in the first place). Fingers crossed!
Looking good! I'm always impressed by your patience with masking canopies.
ReplyDeleteKudos on moving on to airbrushing!
Future / Klear is self levelling, so don't be too shy about getting on a good coat. Getting nice panel lines will be easier with a good uniform, impermeable gloss acrylic coat.
Delightful! Silver/bare metal is a real bu**er to paint.
ReplyDelete