Well, here we are, part three of my Plasti-kote P-47 experiment. And despite the disappointment that my Plasti-kote bright metal finish failed to materialise in the hoped for quality I plod on as there are still a few things to learn about this paint.
This time I am looking at masking and how coats of paint applied on top of the Plasti-kote
I was a little worried about masking the Plasti-kote bright metallic as it seemed susceptible to marking and in my first experiment with the toy plane it actually peeled off when I removed the masking tape. However, I am fairly confident that was something to do with the cheap greasy plastic of the toy and won't happen with paint applied to good quality plastic.
But just in case I used as little masking tape as I could and also used my best quality Tamiya modelling masking tape, which is low-tack.
 |
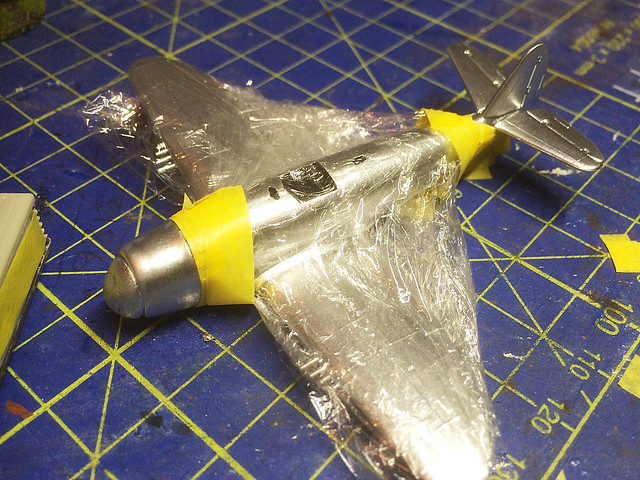
| As usual I use proper masking tape for the actual masking and protect all other areas with cling-film. The cling-film also helps protects the already painted areas. |
Humbrol spray paints have no problem with the Plasti-kote, but air-brushing on acrylics has to be done with some care. You have to get you paint to thinners mix right - in the case of my Vallejo Model Color acrylics this meant I had to add as little water to the mix as I could.
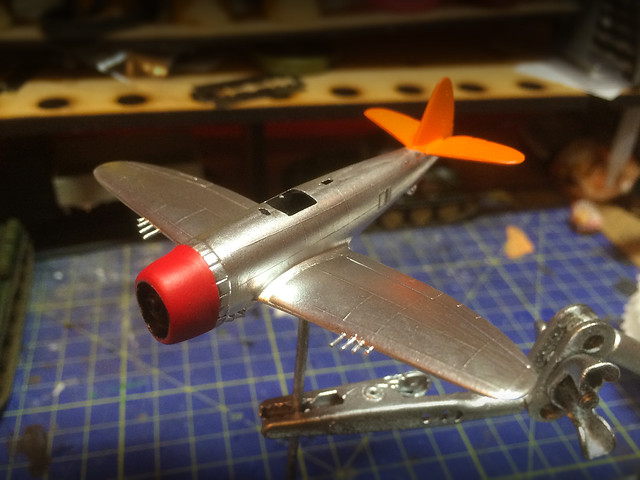
Too much water caused the paint to bead on the surface of the Plasti-kote gloss. The 'neater' the paint mix the better it adhered to the gloss when sprayed onto it. Even so I still had to do the spaying in stages - first spraying a a very thing neat mix lightly to create a base for further light coats. In this way I built up my paint coat onto the Plasti-kote to the desired consistency.
In fact I used the Vallejo Model Colour with only one or two drops of water - just so it would go through my air-brush without choking or splattering. I didn't try Vallejo Model Air paint - which is pre-thinned for airbrushing so can't say how that would fair.
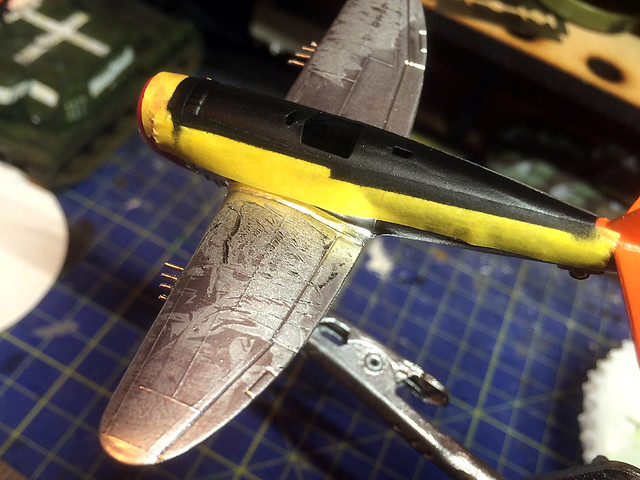
The good news was - with much relief - that when I removed the masking take none of the Plasti-kote paint layer peeled off. There was, however, a little discolouration and marking here and there due to the masking tape gum. This looked like small smudges and dulled the bright metallic shine and could not be 'polished' up again - though I didn't want to rub the Plasti-kote too aggressively.
Experiment over!
Drat! It's a big fat 'fail' for Plasti-kote Bright Metallic I'm afraid (it fell at the final hurdel)!
Drat! It's a big fat 'fail' for Plasti-kote Bright Metallic I'm afraid (it fell at the final hurdel)!
 |
| Plasti-kote Bright Metallic paint does not like cling-film! |
Just when I thought I was going to pull something marginally positive out of this experiment and Plasti-kote turned around and bit me in the ass. Basically the peeling I mentioned that occurred with the first experiment I did was NOT a fluke caused by the cheap plastic of the model I used. Plasti-kote peels big time no matter what preparation...
My guess is that smooth plastic is not a medium that Plasti-kote's Bright Metallic is compatible with. Looking at the Plasti-kote web site it gives a list of materials you can use this paint with and they all appear to be - to one degree or other - porous. The Bright Metallic seems to need a slightly textured surface to adhere to properly.
Of all things it was the kitchen cling-film that caused the peeling you see in the above picture. The sticky plastic seems to have some sort of chemical reaction with the Plasti-kote and despite cling-film not being all that sticky it lifts the metallic paint up like it was designed specifically to do just that!
I'm gutted in a way as it has completely spoiled the model - I suppose I could try cleaning the paint off the wing but as I have found out what I wanted to about the plaintive unsuitability of Plasti-kote's Bright Metallic spray as a modelling medium I hardly feel I want to. It would just be a bodge-up job at best. (But I may feel different once I have slept on it.)
Elsewhere, the masking tape also lifted some flecks of the metallic paint and otherwise discoloured other areas. It was like Plasti-kote was just bidding it's time waiting to show it's flaws right at the last minute!
This seems a lot of work just to find out what others have already said, that Plasti-kote Bright Metallic paint is not for serious modellers. But at least now I know exactly why (and you do to).
Next: Not sure if there will be a next - at least it was just one Pound (£) I wasted! May do a de-brief of what I think of the Revell Micro-Wings P-47 though.


No comments:
Post a Comment