Right, moving on. We are now at the pin-washing stage of weathering. I admit I go a bit heavy with the pin-wash as my models are a bit more 'theatrical' in their painting because that is my preference...

I'm still a fan of AK Interactive's Dark Brown Wash for Green Vehicles for doing pin-washing. As mentioned several times before, it has a 'greasy' grimmy consistency to it that suits vehicles. However, I am slowly starting to move away from outlining *every* crease, seam and panel-line with it, as I did when I first began using this technique.
I'm also starting to take into consideration the paint scheme I'm applying it too. Obviously, it works very well on plain green vehicles (as that is what it was designed for) but, perhaps, less so well on other colours. I'm toying with the idea of experimenting with pin-washing with inks of complimentary colours, for a more subtle effect (I will be trying that with my next models).
Likewise, I am reconsidering my use of chipping. I have done a few models where I have obviously gone over the top with the technique in order to create a more dramatic effect (which seems to be a convention in wargame modelling).
Having said that, here's a lovely photo of an extreme in vehicle chipping and deterioration...
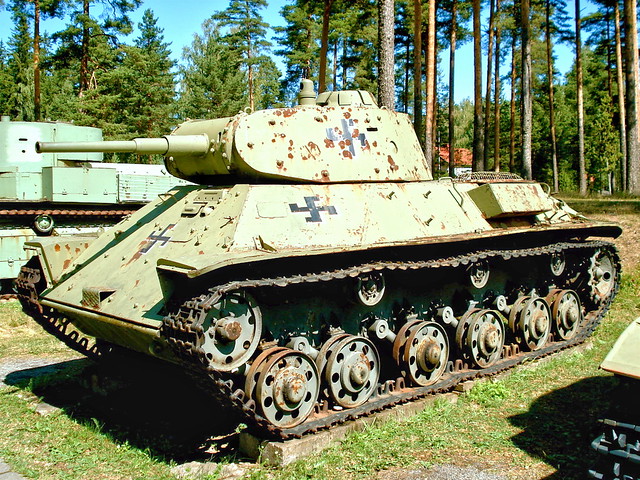 |
| Source: Wikipedia |
I won't be going that far! In fact, I think I will keep the chipping minimal. Maybe some paint wear and tear around the obvious points of traffic - the hatches and clamber points.
Dust and dirt - base layers
Although I used to apply mud and dirt as one of the final layers of weathering I am now doing the dirt effect as a two-stage process. There are areas of the vehicle that are difficult to access later in the build and so they have to have their dust and muck applied earlier on - the inside of tracks is an example of this.
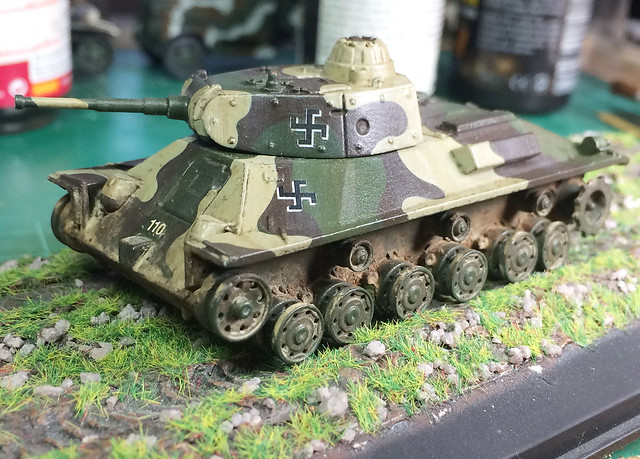
Having tackled the muck behind the road-wheels I can now think about preparing and painting the tracks. In the end, I decided as I was adding mud I might as well add some to the front and back of the hull as well, instead of waiting until later (when I might not be able to match the colours).
She's getting there!
No comments:
Post a Comment