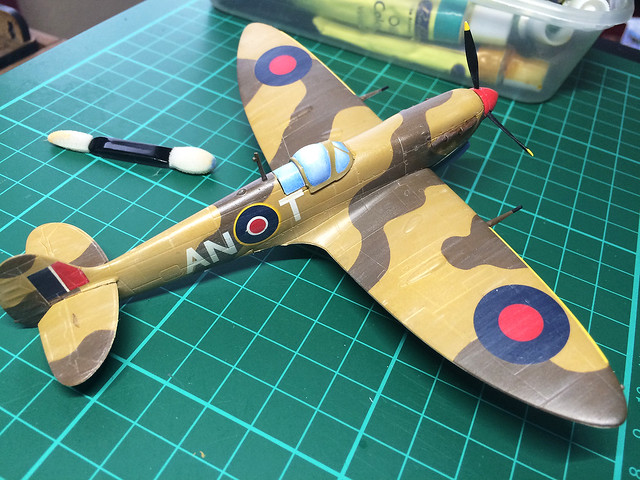
Once this was done, I decided I wanted to apply a little more bleaching - best to do a little at a time so that it's easier to gauge when 'enough is enough'. But, this time, I decided to turn to the eyeshadow makeup medium that I started using recently...
That's better - I'll stop there. I have to bear in mind that there are proceeding stages of weathering (shading, pin-washing, chipping and highlighting), so the overall effect will be cumulative so easy does it).
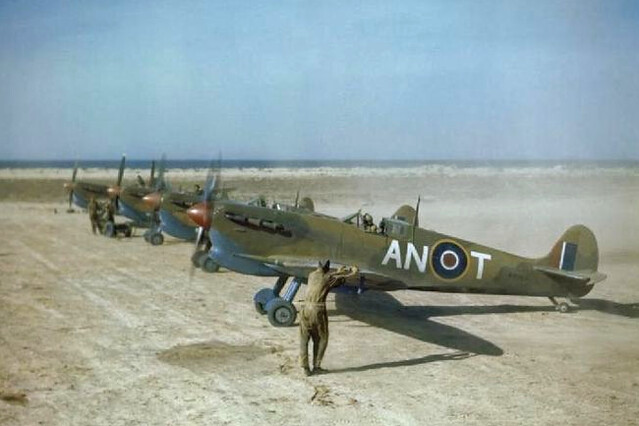 |
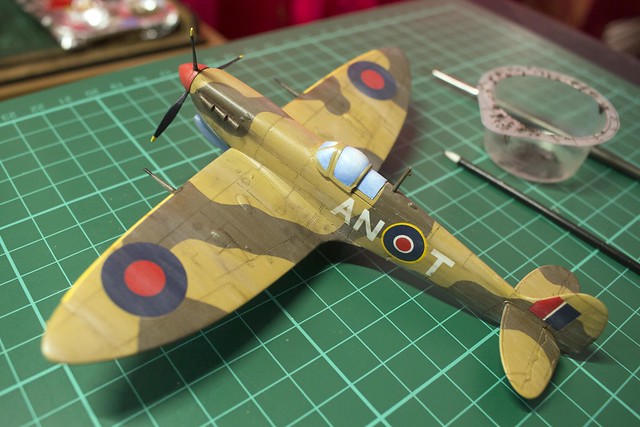
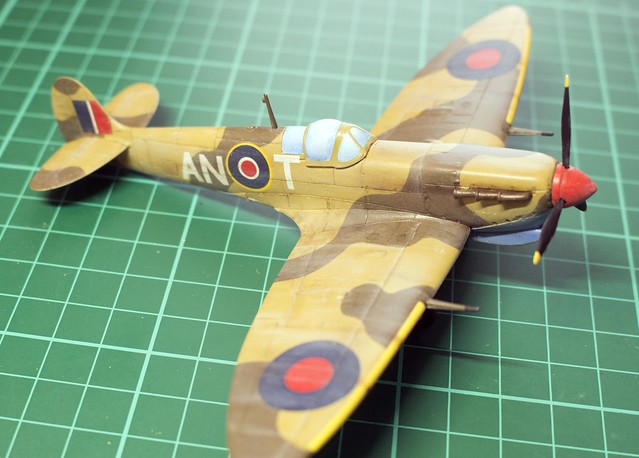
| Oh, look who it is! AN-T - RCAF Spits in Tunisia, 1943. |
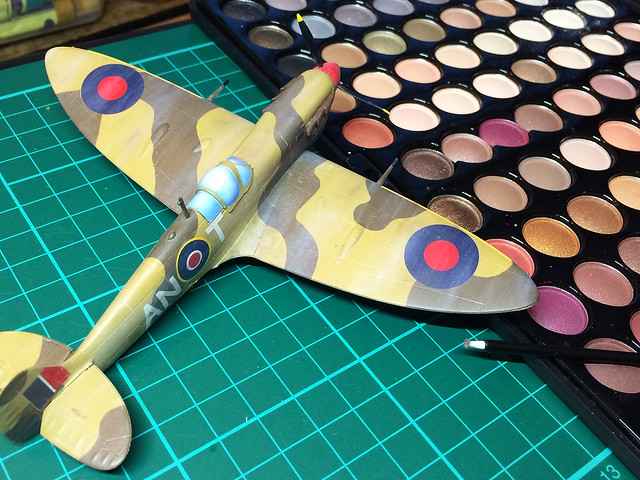
Pin washing...How much?
I'm not quite sure how much or how aggressive my pin-washing should be on an aircraft. Looking around at what other aircraft modellers are doing the intensity of pin-washing seems to vary enormously - from modellers who deem it completely unnecessary, to others who pin-wash heavily - to the point that they nearly outline ever panel in near-black!
I'm going to try out the middle ground, with some mild pin-washing in a subtle complementary colour...
I'll stop there, I've tried to be subtle, not aggressively outlining every panel. I used AK Interactive's Enamel Wash Dark Brown as this is my tried and tested 'go to' product for pin-washing. I like it's greasy brown colour whatever the base colour as it's about adding grime into recesses.
You'll notice I also used the AK wash to add darker streaks and some light 'shading' to accentuate panel shapes. It's not such a delineating a technique as pre-shading, which precisely marks out the division between each panel with subtle shading, but the translucent 'grid' effect pre-shading creates is not to everyone's taste.
Highlighting - accentuating panel contrast
As it stands, the effect is a little 'flat' so the final stage of this shading stage is adding the highlights. By adding some very light, contrasting colours, I hope to give the surface an enhanced 3-dinesional aspect or depth. Well, that's the theory anyway.
I'll be using coloured pencils for this, with the ability to sharpen pencils to a very sharp, precise point I should be able to add very delicate highlight lines around small areas...
Well, that's about it I think. I could add some chipping, but I don't think it really needs it. All I really need to do now is seal my weathering by giving it a very light coat of matt or satin varnish and I think I'll call it quits on this one.
Next: Completion photos.
No comments:
Post a Comment